Wednesday, August 31, 2011

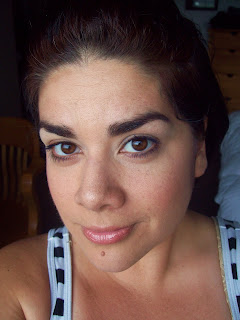
FOTD: Using Kiss My Sass

Photobucket

The other day the mister and I decided to check out the family day at one of the many summer festivals here in our local area. Thus I decided to play in a little bit of my war paint to come up with something summery and essentially easy to apply and wear (because of how humid it had been that week).

Since I want to make sure I get as much proper wearability to my recent purchases, I decided I would try making a different look using products from Kiss My Sass.

 Photobucket

Photobucket

Better Look at the eyes

Photobucket

Photobucket

Photobucket

Photobucket

Looking at just ONE eye

Photobucket

Photobucket

Products used for Eyes:
Urban Decay Primer Potion
NYX Jumbo Eye Pencil in Yogurt (all over lid)
Kiss My Sass shadow in Tea Rose (all over lid)
Kiss My Sass shadow in Sahara (blended into crease)
Kiss My Sass shadow in Fiesty (blended into crease and lower lash line)
Kiss My Sass shadow in Drama Queen (brow bone and inner tear duct as eye brightener)
MAC Eye Kohl in Fascinating (water line)
P2 Automatic Eye Kahul in Dark Brown (upper lash line smudged)
Rimmel Glam Eyes Day 2 Night Mascara in black

The mister said the colors on the eyes reminded him of sorbet t ice cream!!!

Lips

Photobucket 

Products used:
ELF Essential Lip Liner in Spice (outlined and filled in)
Kiss My Sass Lip Mixer in In the Buff (blended in)

Normally I don't like a majorly nude lip, but I thought it would be the perfect way to test out to the product. Plus I had such a loud shirt on (ie the design/ print) I needed something to draw less attention. 


For the rest of the face

Photobucket

Products used
ELF Studio Complete Concealer in Light
Sabrina Cosmetics Pressed Powder in 03
ELF Studio Bronzer and blush Duo (bronzer for contour)
Coastal Scents 10 blush palette (peachy pink matte color)
Kiss My Sass Highlighter in Glisten


Overall, I was pretty pleased with the look. By the end of the humid day the face make up pretty much melted off (stupid humidity), but the eye shadow looked fabulous!!!


I'm Including a few pics from the festival 

Me and the Mister riding the ferris wheel

Looking out into the distance from being on the ferris wheel

Mister and our nuts!!!!


Tuesday, August 30, 2011

In the Bar is Now added to the YouTube


As I do tend to go out quite a bit recently on the weekends with my friends, we have become more and more of Pregamers before heading off for the night. All meeting at my Jew's house, as she has an amazing bar and is a great mastermind and mixer of the drinks. 

As funny as this sounds, the drunker she is...the better the drinks taste!!!! 


If you aren't that much of a mixed drinker, you more than likely won't like this recipe...however it's just funny to watch!!! 


Day 22: I want to be better at it

Day 22: A picture of something you wish you were better at


I don't doubt someone will wonder why exactly I chose this photo for what I need to work on. Although it is perhaps quite agruable that I'm a pretty good wife, I still feel like there are things I need work on. I can cook, but I wish I knew more recipes of foods that the mister really enjoys (IE southern cooking). 

I wish I was able to bring in a bit more money to the household, as I tend to spend a decent amount of it! I wish I could motivate my mister a bit more to get into school. I wish there was more time in the day so that I could get all the extra projects that need to be done (or that I want to do) finished before the mister walks through the door.

Again, I know I am a good wife...but it never hurts to be a bit better!!!

Monday, August 29, 2011

Updates/ Addendum to my Posts on Luminessair Every Day Make Up Kit

Photobucket

I just wanted to note  a few things on this blog post that I did receive some clarification on (as I want to make sure I am sharing all proper facts and information with anyone who happens to read this blog).

  • I had emailed the lovely Emily at Luminessair to find out the reasoning for the logo being a butterfly and she shared the following information with me.  "To answer your question about our logo, the reason the butterfly is our company logo is for multiple reasons :) The first is because the butterfly signifies the metamorphosis and the transformation of an individual who uses our product to Achieve a flawless look. The butterfly is also considered a sign of good luck in many cultures and takes flight through the "Air"."

  •  I also did need to clarify that I was mistaken in my initial blog posting and haul video that is found on my YouTube channel about where Luminessair can send packages to. In both my blog and in my video I stated they were unable to send to my PO box because they could not send mail internationally. However that is not the case, Emily did let me know the following, " I did notice that you mentioned that we do not ship outside the U.S. and we actually do, but since we use FedEx we can not send to PO Boxes or APO addresses."  I did want everyone to know this information, as I want to be honest and through with any products that I receive for review purposes.

  • Finally, I wanted to also point out that Emily does keep tabs on all blog posts, videos that are done by those who are reviewing the products of Luminessair as in my most recent email exchange with her she did comment, "I did notice that you prefer a more matte finish, and I would recommend setting your Luminess look with a translucent powder to finish off your look. :)". I am quite appreciative of the great tip that was not pointed out in the actual video guide (supplied with the kit). Thank you very much Emily, plus it let's me know that Luminessair (especially Emily) really make sure their customers (or reviewers in my case) are satisfied
 
I am again just sharing this information because I feel the need to make sure I am telling everyone the whole truth and nothing but the truth!!!

Review to be up this week of Luminess!!! 

Halloween: Elvira Mistress of the Dark


I tried my hand at a Halloween tutorial last year and decided to do Elvira Mistress of the Dark (because I was contemplating being her for Halloween...however I did go with a different costume all together). 

The make up itself isn't necessarily the greatest I can do...mind you I had been doing videos for 10 months when I tried my hand at this look. And although it was rough looking (at least in my opinion) it is decent.

I found the how to on her make up by looking it up on google and pretty much just followed the guideline.


Couple of pics of my rendition of the look 


Better look at the eyes 


Yeah I know I needed a better eye base and to darken the shadows a bit!!

 Elvira was known for her sexiness!!! MEOW

Overall, I did okay for attempting to recreat Elvira Mistress of the Night...I'm including the video I have on my YouTube channel...my intro and outro are totally silly! Apparently I decided I really wanted to stay in character!!!!

Day 21: I Wish...I Wish

Day 21 - A picture of something you wish you could forget


Having a bad experience at a Border Checkpoint!!!!

Thursday, August 25, 2011

Book of the Month: I Hope They Serve Beer in Hell


I borrowed this book recently from my friend (who is deployed right now), considering the other week I watched the movie version based off of this novel (when I was babysitting..I know I know...crazy huh?). 

Me and Him had talked about this novel before, as I had noticed he had this one and the second one "Assholes Finish First" (which I'm borrowing now...so that will be my September book of the month).

Now this novel is not for the weak of stomach, conservative thinker, or sexually prudish. This book is a recollection of different drunken stories of debauchery by the author, Tucker Max

The only real thing I can say is that I laughed my ass off, true I do have a odd sense of humor. And no lies there were some stories where I was pretty grossed out...but what do you expect from a 20 something male? 

I could tell you some of my favorite stories...but needless to say....I think alot of my readers would be a bit disgusted!!! 

So if you are open minded, find drunk stories entertaining, and don't mind a man being an asshole...then I suggest checking this book out. I promise you...you won't be able to forget it!!

Requested Look: Teen Make Up

Photobucket

Getting into the discussion of school starting next week here in Germany at the military schools, one of my friends and fellow military spouses actually made a make up request (as we were sitting drinking our coffee).

When I originally started making tutorials on my YouTube, I started off making picture tutorials (as I was not comfortable doing make up in front of the camera..plus I had a pretty shitty camera). So about this time last year I had gotten a request to do a teen make up look from one of my younger subscribers.  And since my friends know I do YouTube, they have obviously been checking out my videos here and there. Hence why my friend decided I needed to do a live tutorial version of teen make up.

Face:

Photobucket

Considering alot of teens should not (or choose not to) wear alot of face make up, I decided to keep the look pretty simple. Mostly reminding to conceal any spots and circles under their eyes (if they need to). Followed by a simple pressed powder to help eliminate shine (as teen hormones can make for an oily face).  And then just a light swipe of a blush just to give a little color to the face.

Photobucket

Products used:
ELF Studio Complete Concealer in Light
Sabrina Cosmetics Pressed Powder in #3
Blush from Coastal Scents 10 Blush Palette
NYX Mega Lipgloss in Perfect


Eyes:

Photobucket


Photobucket

Photobucket

Photobucket

I wanted to keep the eyes semi simple and pretty light, so that you could tell there is make up on. However I didn't want it to look over done, especially considering this is for teenage girls. As I personally have a slight issue when I am out doing errands and have seen teenage girls wearing just as much make up as I do when I'm going out for a night with friends. Also, another issue I have is the black eyeliner on teenage girls...it's not that I dont think they should wear it. Rather then do tend to wear too much of it and then end up looking like raccoon later on in the day (I saw this first hand when I coached my girls 13 to 15 yr old basketball team). 

Photobucket

Photobucket

A simple neutralish eye with some more natural looking eyeliner (as I have always thought brown tends to look less harsh than black). 

Products used
ELF Essential Eyelid Primer
Coastal Scents 88 Matte Eyeshadow Palette (golden shimmery brown, dark matte brown mixed with a darker shimmery brown, light flesh tone matte, soft shimmery gold yellow)
P2 Automatic eye Kohl in Dark Brown (upper lash line and 1/4 on lower lash line)
Rimmel Glam Eyes Day 2 Night Mascara in black using Length side (top lashes only)

Hopefully my friend and her daughter actually like the look, though the colors dont have to be exact. I mostly wanted to point out that it's pretty easy to do with coordinating make up colors and of course about the eyeliner (doesn't need to be plied on thick).

Video


Wednesday, August 24, 2011

FOTD and Demo of using the Luminessair EveryDay Beauty Kit


If you have been watching my Tweet feed, you know I have been rambling on about the Air Brush make up Kit that I received from LuminessAir recently (as I'm throughly trying to review the kit by the beginning of this weekend).

Thus today I sat down and filmed a Demo of using the products (keeping this in mind, I am by NO MEANS a Professional when it comes it Air Brush Make Up Application). I believe that I will need more practice on myself and major practice on a few faces to get a better feel and hang for Air Brushing. 

So my FOTD is really an Air Brush FOTD....each picture is taken by the different levels of make up applied

Clean Face NO MAKEUP
Pretty scary!
As you can see from the picture I do suffer from some red spots (regiments of some pimples), a few small scars from some cyst acne, and darker circles under my eyes (damn me for staying up late blogging!!).

  • First step was to apply the Primer and Moisturizer with the Air Brush Gun. I used a total of 2 drops of product
  • Next Conceal any problem spots using my Shade 2 (which is the lighter shade of the two that I received in my kit). I used a total of 4 drops for this and made sure to conceal all my red spots and under my eyes
Concealed as best I could

  • Next the foundation application process, for this I used the foundation 3 in Golden Beige and placed 6 drops into my air brush gun. For applying the product I started off on the right side of my face and worked around (using the swirl motion as I applied). I do want to point out that I was able to go over my face a total of two times throughly doing so. That after I had finished one side of my face and moved on to the next, it had given the original side I started on enough time to dry.
  • When I had filmed I showed myself only applying a total of 2 layers, however I did end up doing a total of 3 layers of foundation as I wanted a definite medium coverage of my skin. With my next application I only added another two drops to the air gun, so I used a total of 8 drops for my foundation. 
face now fully covered

  • Next I applied Blush to the apples of my cheeks, I used a total of 3 drops in the air brush gun. The blush color itself is a matt pinky peach, so if applied properly it gives a nice flush of color. 
  • I opted not to apply bronzer as I noticed the bronzer I had did seem to have some shimmer in it, considering I was planning on using the Highlighting glow as well. I decided I didn't want to over do the shine on my face (I didn't want to look like a grease ball later).
Yup I'm wearing Blush

Better angle...see the soft pink!!!

  • Lastly I applied the Brightening Glow as a highlight (thus giving a dewy, glow to my face). I'm not necessarily sure if I like the Glow as after wearing for some time I notice I look more oily. I think it's just because I'm not use to the Dewy look. I applied 2 drops of the product into the air brush gun and applied it on the tops of my cheeks (above the blush), slightly on my forehead and down my nose, above my cupids bow and chin.
A finished Air Brushed face!!!

  • To finish off the look I brushed throw my brows, applied a colored mascara and a bit of gloss and was ready to go do my errands for the day!
Closer view of the face....I know I look kinda pale! 

Overall not a bad look!! (without mascara or gloss)


Final FOTD


All Products used:
LuminessAir Primer and Moisturizer
Luminessair Shade 2 foundation as concealer
Luminessair Shade 3 Golden Beige as foundation
Luminessair Blush in N3 on apples of cheeks
Luminessair Brightening Glow in G1 for highlight
Apple Cosmetic's Blue Mascara
Mac Lip Jelle in Valentine's

Here's the video where I show everything I have talked about!!!

How I got my Mac Pro Card

Photobucket

I did a recent haul and am currently having a giveaway here on my blog in which some recent products I purchased from MAC using my new Pro Discount Card. I got a few comments already on the haul video on my YouTube, thus I decided I would answer the age old question:

How did you Apply and Get Approved for the MAC Pro Card???

Honestly I did a bit of research on the internet, mostly looking on YouTube videos about how the every day person could attempt to apply for the Pro Discount card.

Now, if you don't already know, I do claim to be a Freelance Make Up Artist (although my website is sadly needing a huge update with pictures from shoots I have done work for).  My Facebook page for my Make up is where I do tend to post recent pictures from various shoots and make overs I have done here in the local German area. I have been very fortunate enough to have met and befriended a few local photographers that have given me enough exposure (and clients) to where I am hoping to continue to work and grow as an artist. As well as expand my portfolio to showcase all the different aspects of my work. 


The most informative video I found about the actual items you would need to apply as a freelance Artist came from fellow YouTube Laura AKA Laura62484

I'm including her video so you can see it yourself!


Considering I have an official website, and I was approved for a Model Mayhem Account (this is a network for Photographers, Models, MUA, Hairstylists, Clothing Designers, Retouchers, ETC). I decided to attempt to apply for various MUA discount cards. 

I actually applied and was accepted by OCC Pro card on Feb 23, 2011 (which is free, that is a discount of 20%. I have yet to sign up for any others as I need to actually look at their websites and just haven't gotten around to doing it yet.

I don't know what really made me decide to attempt to get the MAC card, I think it was more because I know alot of friends and clients prefer that brand. And there are a few products that I have in my personal collection and also in my Professional Kit that are from MAC (that I actually do like using). So I figured what the heck, the only spending I'm really willing to do. I figured with the savings on the products (as the MUA discount is 40% off of products) I would be saving the amount that I spent on the actual application (fee is $35). 

The application online is simple enough, it the other paperwork (especially if you have no formal training like myself) that you need to actually work on yourself. Mind you, when I had thought about applying for the MAC Pro Card I had asked one of the photographers I have worked with regularly if he would write me a letter of recommendation for the card.  Sadly this was taking quite long, thus after watching Laura's video I decided to check out the wonderful world of VistaPrint.Com and come up with a few things!

Business Card
Photobucket
Considering when I was first starting off I was using some really ghetto computer printed card. Just so that I had something to hand to a person, if they were interested in make up. Or when I first started working with photographers. I KNEW I NEEDED to upgrade, thus I decided at the time I should do it!

I personally designed my business card, at the website of Vistaprint.Com they have all different types of templates. Thus I did borrow some of the template, but then made it my own with adding the picture on it. Yes, that is me....rocking my Barbie Girl Make Up from Halloween tutorial I did last year! I figured might as well put my face on the card, so that even if I had my card passed amongst others. If they were to see me in the post office on base or at the commissionary (the grocery store on base) they would know who I am. 

Composition Card
Photobucket
Again another design by me and this is on an Oversized Postcard

Ideally what a composition card is a mock of of some of the various work you have done as an Artist. Yes, the center picture is the largest of costume make up (and yes it's my mister...at the time that I did this. I was the most proud of how he had come out. Still am actually). And yes, you will see me in the corner again as well (though it's because I didn't really have too many other pictures at the time to choose from). I more than likely when funds are more available and when I have used up more of these cards (whether as postcards or comp cards for MUA discount cards). I will redo my comp card and keep more editioral, fashion, costume looks together and have the more bridal, natural and more basic on another. 

It was including these two different pieces of identification that allowed me to get approved for the MAC Pro discount card. I must say it did take quite some time for me to find out I was approved. I had all my business cards and Comp cards in by the middle of March, thus I'm thinking I sent out my application early April. 

Funny how things work out, as my credit card (that I had submitted with my application) was charged the intial fee on May 30, 2011. Though I would not receive my official email welcoming me to the Pro Discount Card Membership until June 6,2011 (how do you like them apples?).

The hard copy of the card was mailed to my address in the states on June 29, 2011 and received about 5 days later.


**IMPORTANT TO NOTE: Considering I am living internationally at the time that I applied for the card (and the MAC site would not take an APO address to it's address file). I had to use my permanent address which is my parents address! 

I have made a few purchases already to MAC using my discount, though it sucks not to be able to use the discount and get free shipping (but I guess there is always a little give and take). 

Anyways, if I reapply to renew my discount card from MAC next year...I have yet to decide for now. I feel that having two MUA Discount cards to two different brands is pretty good. Especially considering I have no formal education when it comes to make up application!!!


FOTN: Went Fierce to Countdown!!!

Photobucket

So I have pretty much worn all my cute outfits from my wardrobe out to the pub and dance club here in my village a few times through since the beginning of summer. I figured the only way to change things up was to do a funky look with my make up. 

I was inspired by a tutorial done by the lovely BoyWithBrushes and decided to play and see what happened. And of course when using bright colors...might as well use some big false lashes and colored contacts!!!

Photobucket


Photobucket
The look itself was an attemption of a cut crease but I kinda suck at them!!!

Photobucket
But adding the Arabic lower lash line gave it something else!!!

One of my guy friends that was out with us that night at one point looked at me and said "Lo, your make up is so FIERCE. I keep finding myself staring at you".

Mind you this coming from a guy, when I had a tube top shirt with a small keyhole opening at the top of the bust...so he could've easily stared at something else!!! Stuff like that makes me giggle!!!

Overall, it wasn't my best work at something funky, but it did catch alot of attention!!!
Photobucket


Products used for Look:
Mac ProLong Wear Foundation in NC20
Hard Candy Glamofoge in Light
Mac Prep and Prime Loose Powder
Mac Mineralize SkinFinish in Sunny by Nature (contour)
Coastal Scents 10 Blush Palette (hot Pink color) for cheeks
Urban Decay Primer Potion
NYX Jumbo Eye Pencil in Milk
Coastal Scents 88 Matte Eyeshadow Palette (hot pinks, light pink, purple pink, white, black)
P2 Automatic Eye Kohl in Black (water line, lower lash line)
NYC Liquid Eyeliner in Black (upper lash line)
Rimmel Glam Eyes Day 2 Night Mascara in Black (both Volume and Length)
Red Cherry Lashes #203
Nabi Lipliner in Pearl Pink
NYX Black Label Lipstick in Girly Pink
Revlon Superlucious Lipgloss in Pink Pursuit